Server Configuration
Setting up a server
Choose a port: The first server automatically gets port 502 (the Modbus standard). Additional servers get the next available port number. You can manually change the port if needed.
Give it a name: Give your server a descriptive name, especially when running multiple servers at the same time.
Select a Unit ID: Each Unit ID (0-255) behaves as an independent virtual device with its own registers. Select the Unit ID you want to configure from the dropdown.
Set the word order: Use the BE/LE toggle in the toolbar to choose Big-Endian or Little-Endian for the entire server. This is a global setting, so all registers on this server share the same word order.
Want multiple servers? Click + to add a new server (maximum 10). Switch between servers via the selector buttons at the top.
Adding registers
Expand the appropriate panel (Coils, Discrete Inputs, Input Registers or Holding Registers) and click Add Register.
For Input Registers and Holding Registers you configure:
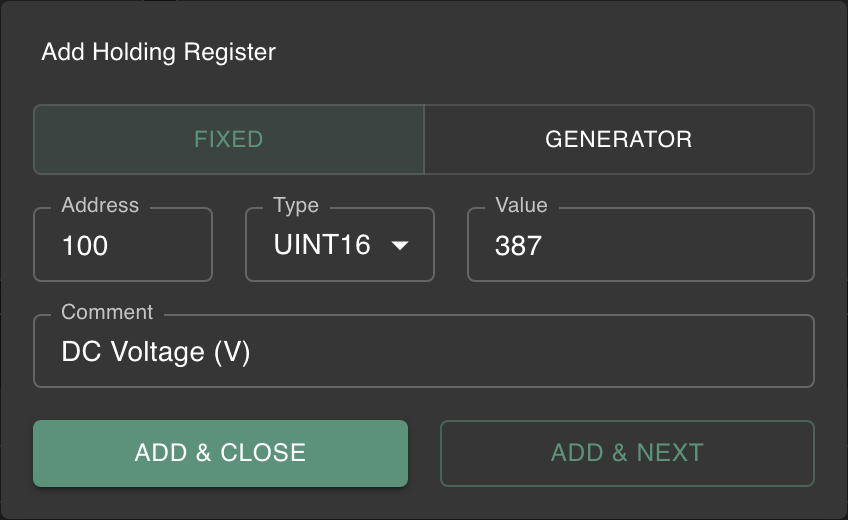
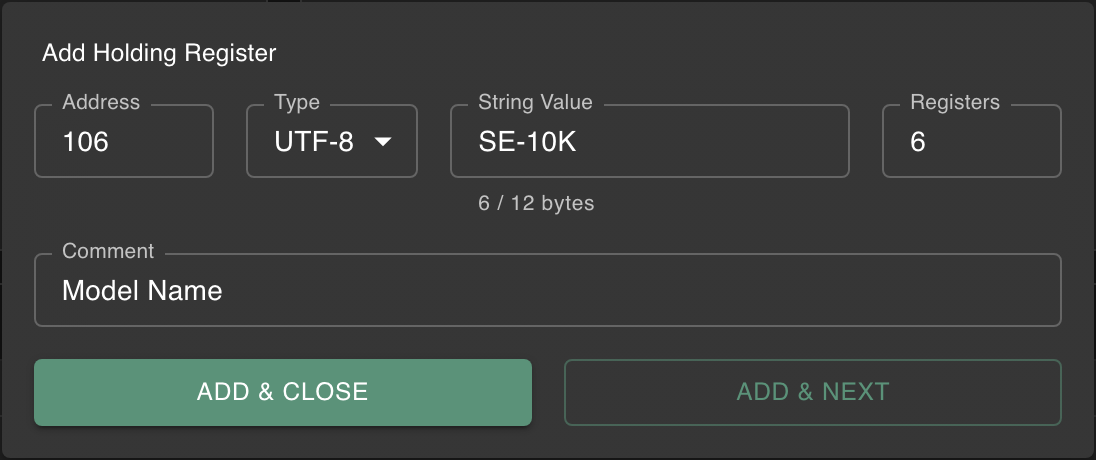
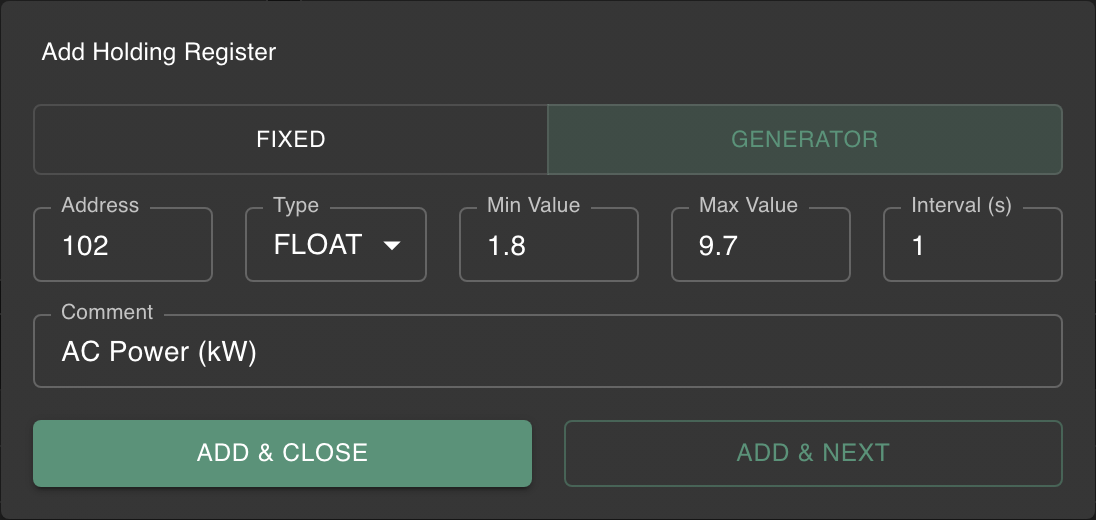
- Address (0-65535)
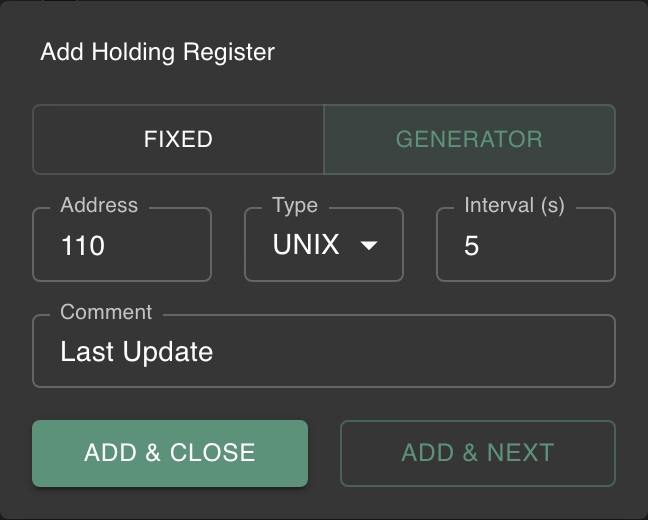
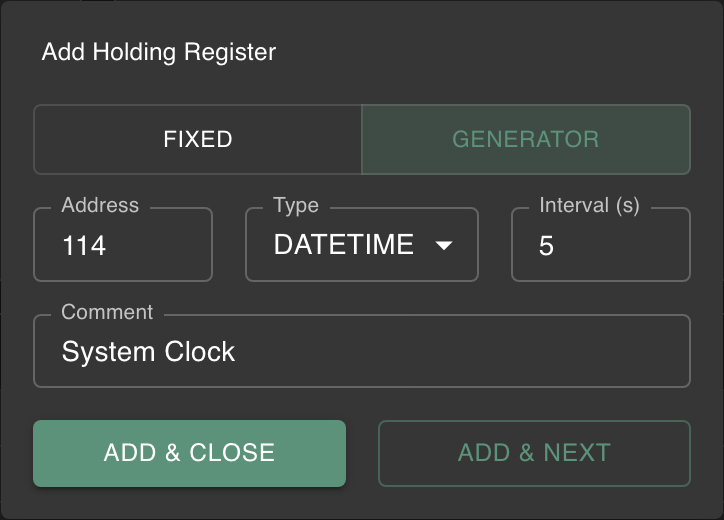
- Data type: choose from:
int16,uint16(1 register)int32,uint32,float(2 registers)int64,uint64,double(4 registers)unix: Unix timestamp (2 registers)datetime: IEC 870-5 datetime (4 registers)utf8: UTF-8 string (variable length, 1-124 registers)bitmap: 16-bit bitmap (1 register)
- Value: a fixed value, or a value generator for dynamic data
- Comment: optional description
Multi-register types automatically reserve consecutive addresses. A float at address 100 occupies addresses 100 and 101. A UTF-8 string shows a real-time byte counter so you can see how much space your text uses.
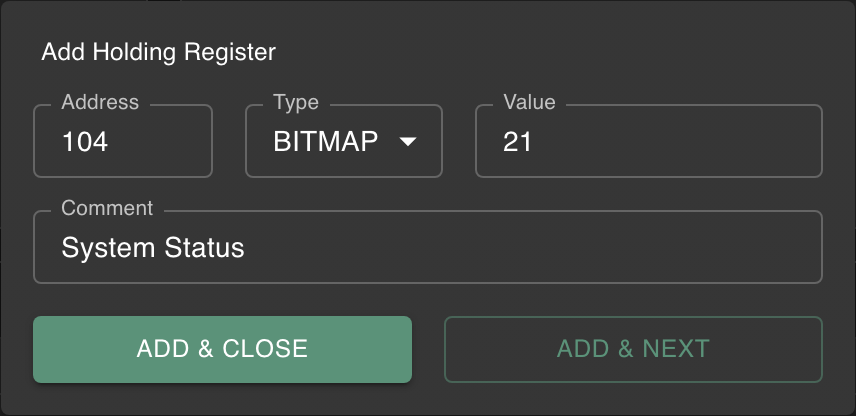
You can leave the value at 0. Once the register is added, you can toggle individual bits and add comments directly in the register grid.

The unix and datetime fixed modes use a DateTimePicker for convenient date/time entry. The UTC toggle switches the picker display between your local timezone and UTC, but the stored register value is always encoded in UTC regardless of the toggle state.
Coils and Discrete Inputs are managed as individual address rows:
- Each boolean gets its own row with a toggle circle to set the value
- Add new booleans via the inline add bar. The address auto-increments to the next free address
- Add an inline comment to describe each boolean (e.g. "Motor running", "Emergency stop")
- Delete individual booleans by hovering over the row to reveal the trash icon
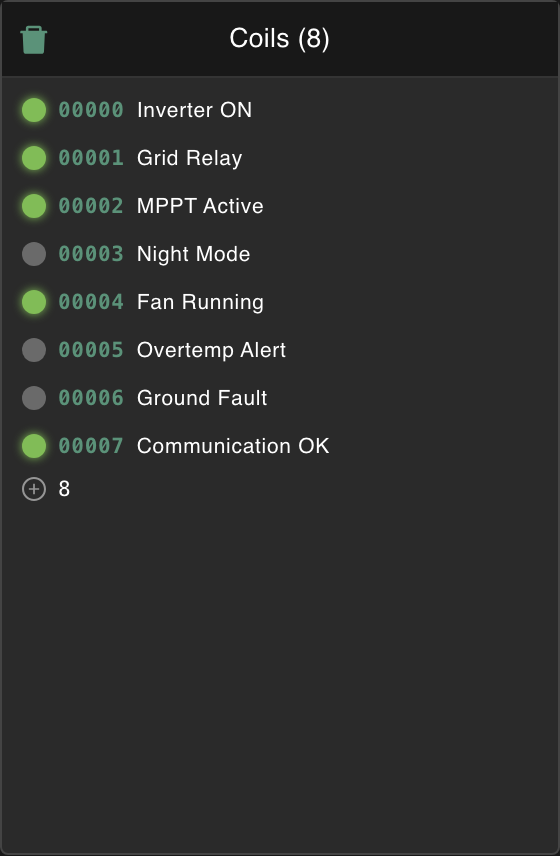
Edit via the pencil icon on the row. Delete via the trash icon, or use Clear All to remove all registers in a panel.

Value generators
Static values are handy, but for realistic testing you want data that changes. That's what value generators are for.
When adding a register, choose Generator as the value type and configure:
- Min Value: the lower bound
- Max Value: the upper bound
- Interval: how often the value changes (1-3600 seconds)
Concrete example: you want to verify that your client's polling is working correctly.
Create an Input Register (float) with min=20, max=80 and interval=5. Every 5 seconds the value jumps to a random value between 20 and 80. Connect your client, enable polling, and you'll immediately see the values changing, confirming your polling setup works.
Time-based generators
For unix and datetime data types, the generator works differently: instead of randomizing between min and max, it outputs the current system time at each interval. This is useful for simulating time-stamped telemetry data. Connect your client and verify that it correctly parses the timestamps.
Generators work with all numeric register types, including the new timestamp types. The values are immediately visible to all connected clients.
The UTC toggle on timestamp registers only changes the display in the DateTimePicker. The register value is always stored and transmitted in UTC. This means clients always receive UTC-encoded timestamps, regardless of the toggle setting on the server.
Saving and loading configurations
If you have a complex server setup, you don't want to rebuild it every time.
- Save: click Save. Everything is stored as JSON: server name, port, all Unit IDs with their registers, data types, values, generators, comments and the global endianness setting
- Load: click Open and select a previously saved JSON file. This completely replaces the current configuration.
Configuration files are now versioned. They include version and modbuxVersion metadata. Old v1 configuration files are automatically migrated when loaded.
Configurations saved in v2 cannot be opened in older versions of Modbux. If a v1 config had registers with different word orders, the most common setting is used globally and a warning is shown. Keep backups if you need to downgrade.